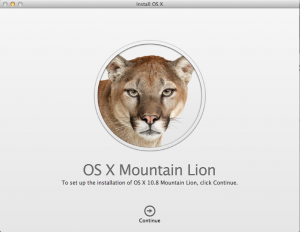
I just downloaded Apple’s newest version of OS X, Mountain Lion. The only way to get Mountain Lion is through the Apple Mac App Store. When you buy it, the installer is saved to your Applications folder. I find it useful to have a physical DVD to install from since it includes the Disk Utility and I like to do a permissions check on my system before I upgrade.
The installer image that you download contains 4.3GB of files on a 4.8GB disk image. The OS X Disk Utility can’t burn a 4.8GB image onto a 4.7GB single-layer DVD, so to be able to use a single-layer DVD, we must copy the files into a disk image that is sized correctly. The steps below outline how to do this.
To install Mountain Lion from a DVD, you first have to download the installer application from the Mac App Store. After it’s finished downloading, follow these steps:
- Open the Finder and go to your Applications folder.
- Right click on the file called “Install OS X Mountain Lion” and click “Show Package Contents”.
- Go to Contents/SharedSupport then right click on InstallESD.dmg and select Copy.
- In the Finder, go to your home directory and paste the InstallESD.dmg file. This is the installation image with Mountain Lion on it.
- After it is finished copying, double click on it to mount the image.
- Next, open the Disk Utility from Applications > Utilities.
- In Disk Utility, go to File > New > Blank Disk Image.
- In the options select:
- Save As: Mountain Lion Install DVD
- Size: 4.6GB
- Format: Mac OS Extended (Journaled)
- Image Format: read/write disk image
- Partitions: Single Partition – Apple Partition Map
- Name: Mountain Lion Install DVD
- Then click create. - After the image is created, it will be mounted.
- Next, open the Terminal and run:
cp -Rvp "/Volumes/Mac OS X Install ESD"/* "/Volumes/Mountain Lion Install DVD"/ - This command will copy the installation files onto the new image you created.
- Once, the copy is complete, go back to Disk Utility and eject both disk images that were mounted.
- Insert your single-layer DVD into your super-drive and select the disk image titled “Mountain Lion Install DVD” and click Burn.
- After the burning process is complete, reinsert the disk into the super-drive and reboot your computer.
- While it’s booting hold down the Option key to select the installer DVD to boot from and follow the installation instructions on the screen.
After all that, you should now be happily running OS X Mountain Lion. If you’re like me, before running the setup choose Disk Utility from the tools menu and do a permissions check on your disk.

I’ve updated the instructions. Thanks!
ReplyDeleteThank you! I went to buy double layer discs at Staples last night and the cheapest spindle was $30… I put them back and used your method with the stacks of single layers I already had. Works perfectly!
ReplyDeleteThank you very much, this worked perfectly. Great guide!
ReplyDelete